
The lid clicks on and off, and holds pretty tight (I have to use a spudge to get it off). The retaining lips seem to flex just the right amount and don't snap off!

The antenna and illuminated button fitted quite tightly. The USB plug fits tight in the hole - perhaps a bit to tightly. Obviously I have a bit more soldering to do!


I decided to mount the PCB using nurled captive nuts that I could push into the plastic. I used the tip of the soldering iron to heat them up and push them in. It was surprisingly easy. I have used countersunk screws in this image because that's all I had to hand.

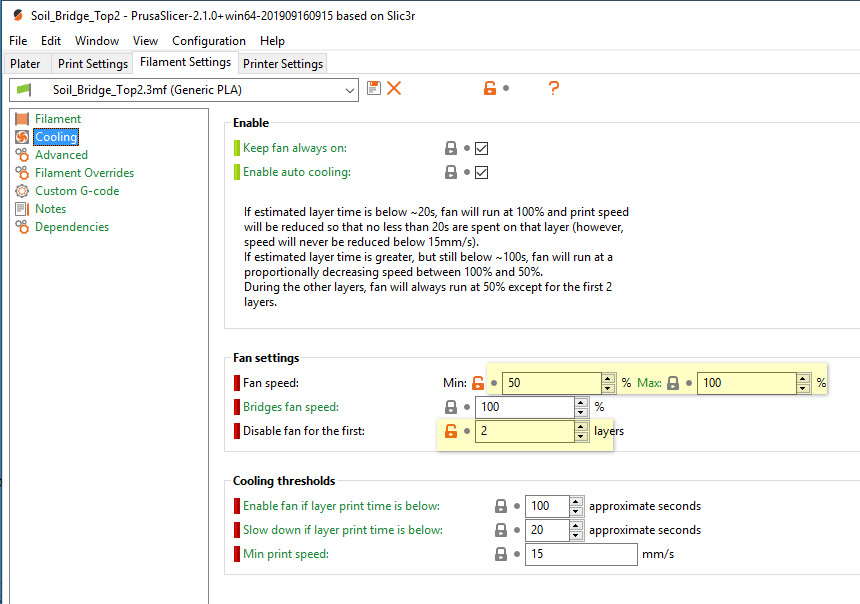
Printing Parameters
I finally managed to reliably print stuff. There seemed to be two issues:I was using the FAST filament setting and this was certainly faster! It simply didn't print the last 10%.

When I changed to the 0.15 OPTIMAL settings things got a lot better.
I also followed David's advice and set the temp lower except for the first two layers.


The odds are overwhelming that when 까모벳 you had stayed at the machine, you would not have hit the identical mixture. It's common to go 20 or 50 or more pulls utilizing a|with no} single payout on a reel-spinning slot, though payouts are more frequent on video slots. Nor is it uncommon for a machine to pay again 150 % or more for quantity of} dozen pulls.
ReplyDelete